1
2
3
4
5
6
7
8
9
10
11
12
13
14
15
16
17
18
19
20
21
22
23
24
25
26
27
28
29
30
31
32
33
34
35
36
37
38
39
40
41
42
43
44
| <script src="./lib/vue-2.6.12.js"></script>
<script src="./lib/dayjs.min.js"></script>
<script>
const vm = new Vue({
el: '#app',
data: {
// 用户输入的品牌名称
brand: '',
// nextId 是下一个,可用的 id
nextId: 4,
// 品牌的列表数据
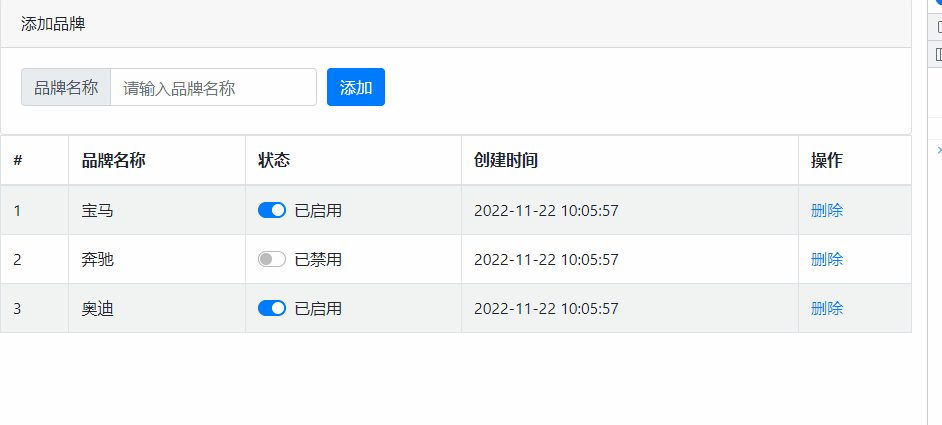
list: [
{ id: 1, name: '宝马', status: true, time: dayjs(new Date()).format('YYYY-MM-DD HH:mm:ss') },
{ id: 2, name: '奔驰', status: false, time: dayjs(new Date()).format('YYYY-MM-DD HH:mm:ss') },
{ id: 3, name: '奥迪', status: true, time: dayjs(new Date()).format('YYYY-MM-DD HH:mm:ss') },
],
},
methods: {
// 点击链接,删除对应的品牌信息
remove(id) {
this.list = this.list.filter(item => item.id !== id)
},
// 阻止表单的默认提交行为之后,触发 add 方法
add() {
// 如果判断到 brand 的值为空字符串,则 return 出去
if (this.brand === '') return alert('必须填写品牌名称!')
// 如果没有被 return 出去,应该执行添加的逻辑
// 1. 先把要添加的品牌对象,整理出来
const obj = {
id: this.nextId,
name: this.brand,
status: true,
time: dayjs(new Date()).format('YYYY-MM-DD HH:mm:ss')
}
// 2. 往 this.list 数组中 push 步骤 1 中得到的对象
this.list.push(obj)
// 3. 清空 this.brand;让 this.nextId 自增 +1
this.brand = ''
this.nextId++
}
},
})
</script>
|