一 概述
- 了解生命周期和生命周期函数的概念
- 初步了解组件创建的过程
- 了解beforeCreate和Created生命周期函数的特点
- 了解beforeMount和mounted生命周期函数
- 组件运行阶段的生命周期函数
- 组件销毁阶段的生命周期函数
二 了解生命周期和生命周期函数的概念
2.1 生命周期&生命周期函数
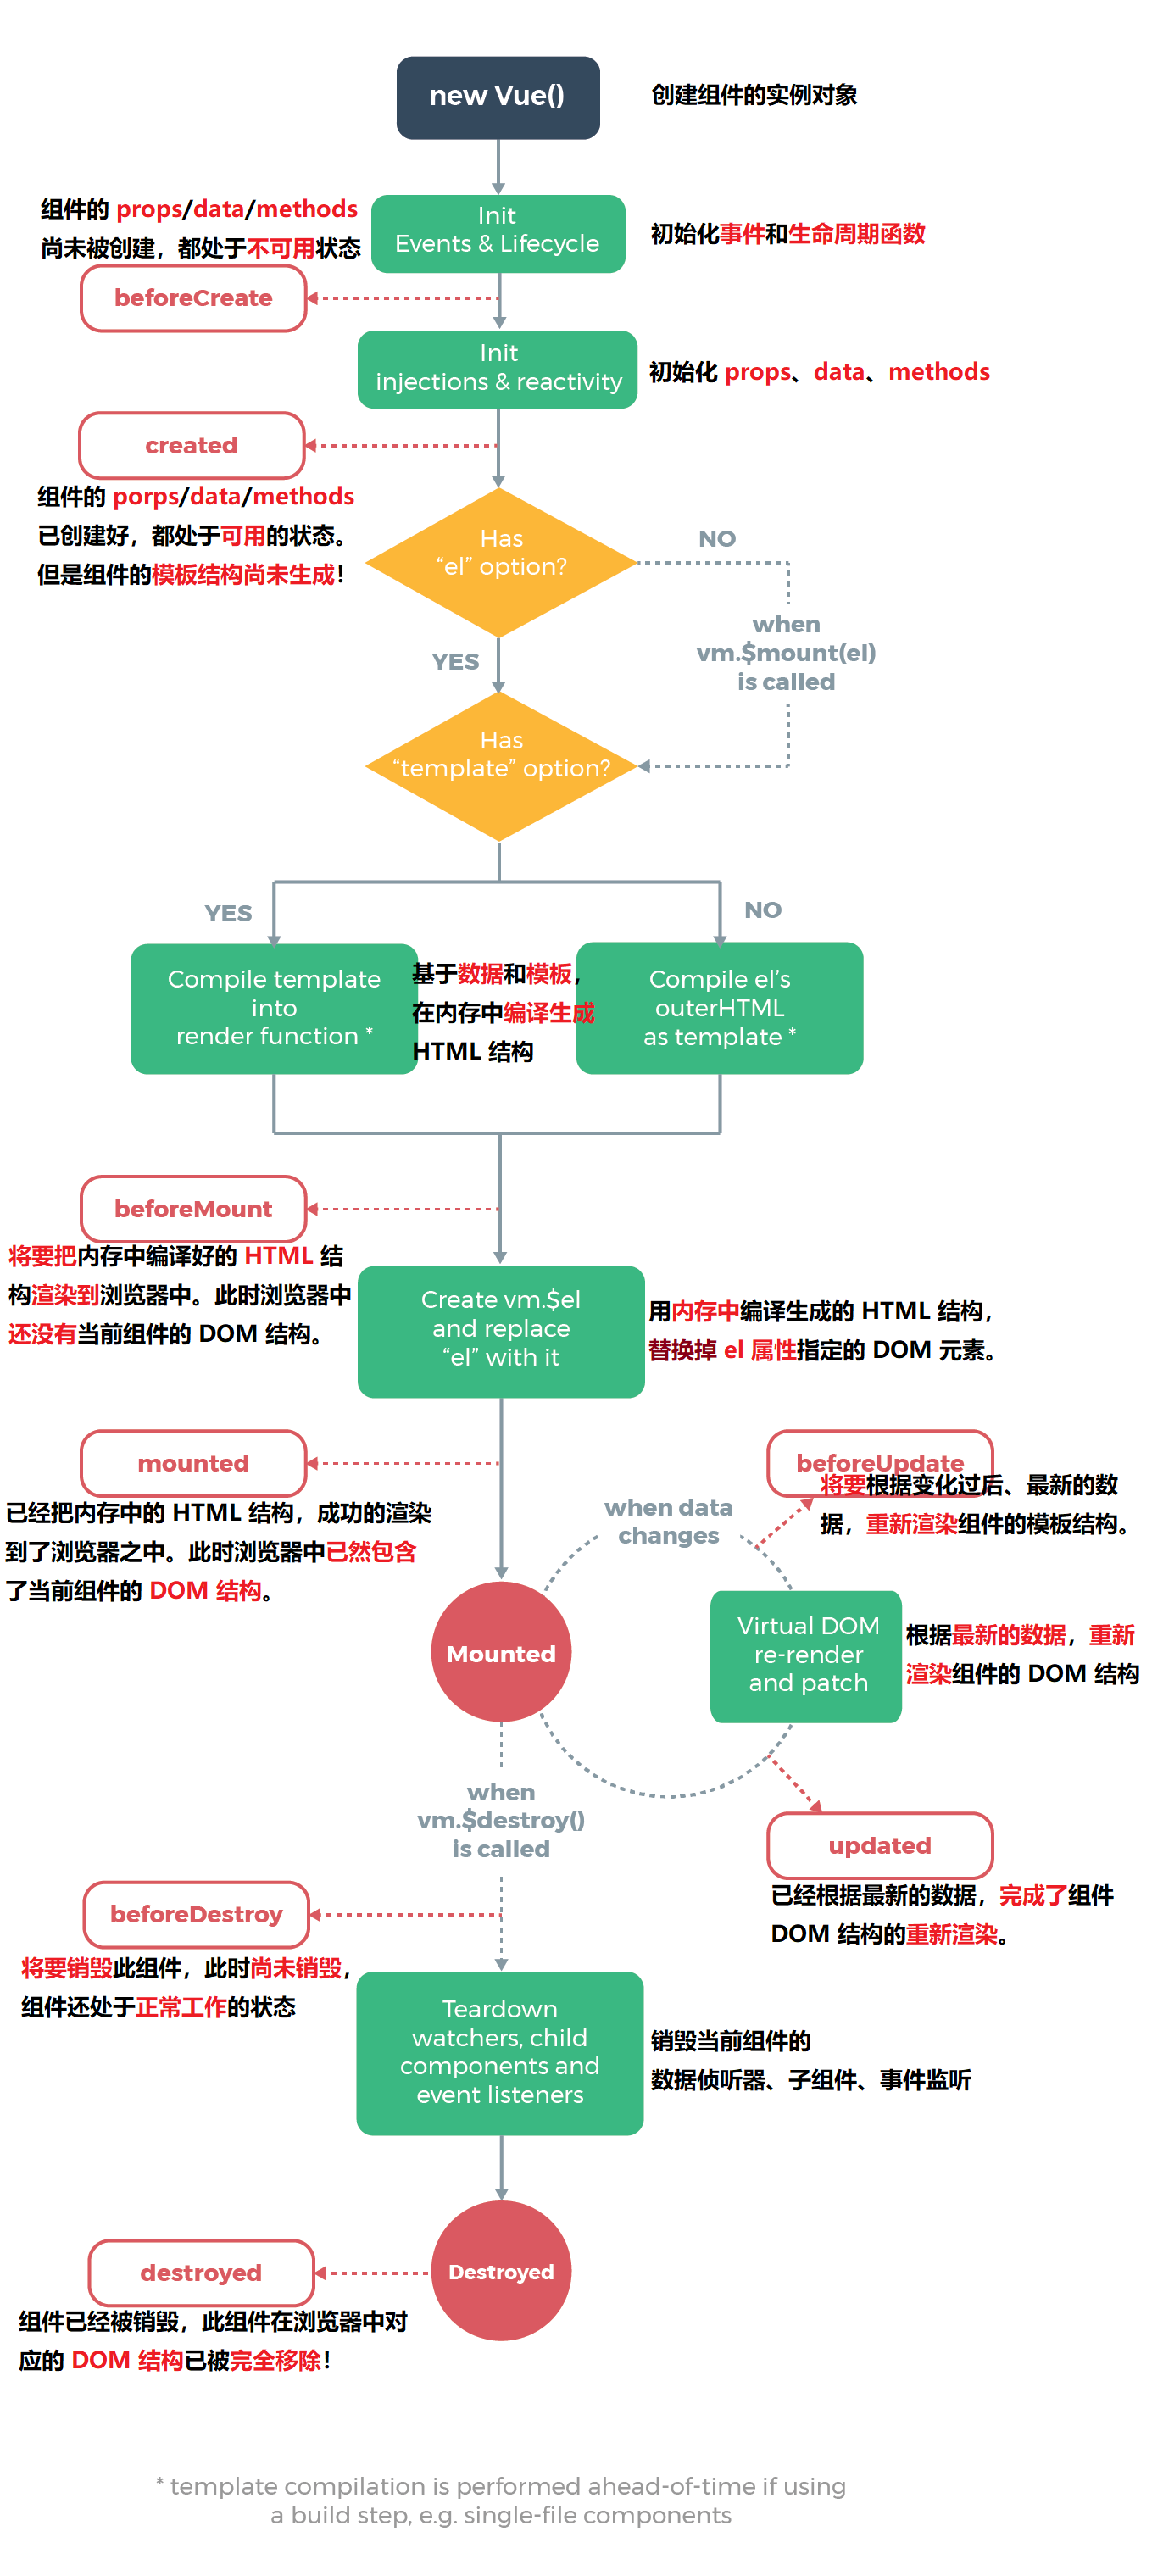
- 生命周期(Life Cycle)是指一个组件从创建-> 运行 -> 销毁的整个阶段,强调的是一个时间段。
- 生命周期函数:是由 vue 框架提供的内置函数,会伴随着组件的生命周期,自动按次序执行。
注意:生命周期强调的是时间段,生命周期函数强调的是时间点
2.2 组件生命周期函数的分类

三 初步了解组件创建的过程
3.1 生命周期图示
四 了解beforeCreate和Created生命周期函数的特点
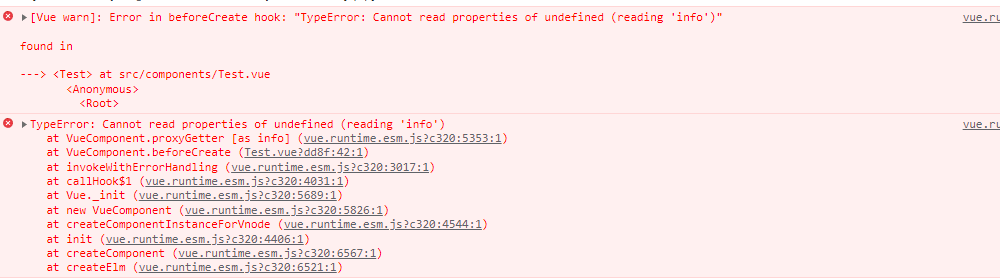
4.1 beforeCreate的调用过程
创建Test.vue生命周期类
1-创建Test.vue类
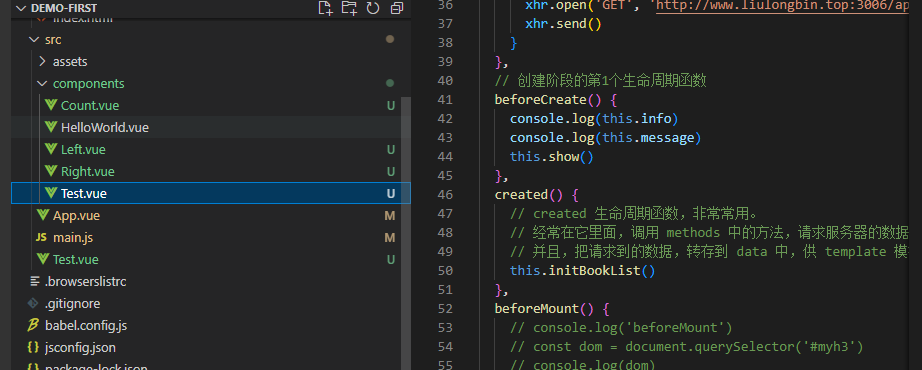
2-定义Test.vue中的属性和data等
1
2
3
4
5
6
7
8
9
10
11
12
13
| export default {
props: ['info'],
data() {
return {
message: 'hello vue.js',
}
},
methods:{
show(){
console.log('调用了Test组件的show方法')
}
}
}
|
3-Test.vue中的生命周期方法beforeCreate
1
2
3
4
5
| beforeCreate() {
console.log(this.info)
console.log(this.message)
this.show()
},
|
在App.vue中导入Test.vue并使用
1
2
3
4
5
6
7
8
9
10
11
12
13
14
15
16
17
18
| import Test from '@/components/Test.vue'
// 2. 注册组件
components: {
Left,
Right,
Test
}
<template>
<div class="app-container">
<h1>App 根组件</h1>
<div class="box">
<!-- 3. 以标签形式,使用注册好的组件 -->
<Left></Left>
<Right></Right>
<Test info="你好"></Test>
</div>
</div>
</template>
|
查看beforeCreate调用结果
4.2 Created-调用initBookList并显示书本数
initBookList函数
1
2
3
4
5
6
7
8
9
10
11
| // 使用 Ajax 请求图书列表的数据
initBookList() {
const xhr = new XMLHttpRequest()
xhr.addEventListener('load', () => {
const result = JSON.parse(xhr.responseText)
console.log(result)
this.books = result.data
})
xhr.open('GET', 'http://www.liulongbin.top:3006/api/getbooks')
xhr.send()
}
|
Created调用
1
2
3
4
5
6
| created() {
// created 生命周期函数,非常常用。
// 经常在它里面,调用 methods 中的方法,请求服务器的数据。
// 并且,把请求到的数据,转存到 data 中,供 template 模板渲染的时候使用!
this.initBookList()
},
|
数据定义及使用
数据定义
1
2
3
4
5
6
7
| data() {
return {
message: 'hello vue.js',
// 定义 books 数组,存储的是所有图书的列表数据。默认为空数组!
books: []
}
},
|
数据使用
1
| <h3 id="myh3">Test.vue 组件 --- {{ books.length }} 本图书</h3>
|
调用结果

五 了解beforeMount和mounted生命周期函数
5.1 beforeMount
1
2
3
4
5
| beforeMount() {
// console.log('beforeMount')
// const dom = document.querySelector('#myh3')
// console.log(dom)
}
|
说明:未成功创建元素,打印为null
5.2 mounted
1
2
3
4
5
| mounted() {
console.log(this.$el)
const dom = document.querySelector('#myh3')
console.log(dom)
},
|
说明:如果要操作当前组件的 DOM,最早,只能在 mounted 阶段执行
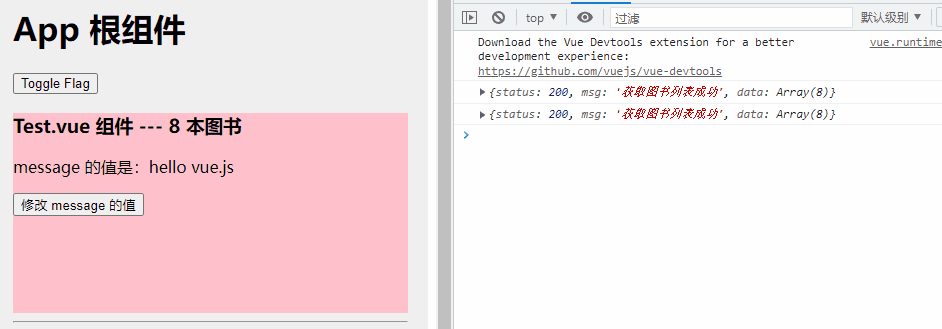
六 组件运行阶段的生命周期函数
组件运行阶段的生命周期函数有2个:beforeUpdate和updated
6.1 准备-界面元素
1
2
3
4
5
6
| <template>
<div class="test-container">
<p id="pppp">message 的值是:{{ message }}</p>
<button @click="message += '~'">修改 message 的值</button>
</div>
</template>
|
6.2 beforeUpdate
1
2
3
4
5
6
| beforeUpdate() {
console.log('beforeUpdate')
console.log(this.message)
const dom = document.querySelector('#pppp')
console.log(dom.innerHTML)
},
|
说明:
- 刷新页面时会触发此方法
- 点击修改message的值时也会触发此方法
6.3 updated
1
2
3
4
5
6
7
| // 当数据变化之后,为了能够操作到最新的 DOM 结构,必须把代码写到 updated 生命周期函数中
updated() {
console.log('updated')
console.log(this.message)
const dom = document.querySelector('#pppp')
console.log(dom.innerHTML)
},
|
七 组件销毁阶段的生命周期函数
7.1 组件和数据
组件
1
2
| <button @click="flag = !flag">Toggle Flag</button>
<Test info="你好" v-if="flag"></Test>
|
数据
1
2
3
4
5
6
7
| export default {
data() {
return {
flag: true
}
},
}
|
7.2 生命周期函数-beforeDestroy和destroyed
1
2
3
4
5
6
7
8
9
| beforeDestroy() {
console.log('beforeDestroy')
this.message = 'aaa'
console.log(this.message)
},
destroyed() {
console.log('destroyed')
// this.message = 'aaa'
}
|
7.3 效果图